Table of Contents
- What You'll Need Before You Start
- Step 1: Rinse Your Facial Cleansing Brush After Every Use
- Step 2: Deep Clean With the Best Soap for Cleaning Facial Brushes
- Step 3: How to Disinfect a Silicone Face Scrubber Safely
- Step 4: Dry and Store Your Brush to Prevent Bacteria Buildup
- How Often to Clean a Facial Brush (and When to Replace the Head)
- Signs Your Facial Brush Needs Replacing
- Common Mistakes to Avoid When Cleaning Your Brush
- Frequently Asked Questions
Last Updated: September 22, 2026
What You'll Need Before You Start
Learning how to clean facial cleansing brush devices properly starts with two cheap supplies you likely already own. A facial cleansing brush is a handheld skincare tool that uses bristles or a silicone surface to loosen dirt, oil, and dead skin during washing. This guide from Hutch's Beauty Boutique walks through the full routine, from a ten-second daily rinse to the deep clean most owners skip.
Gather these first:
- Mild soap or a gentle cleanser
- Warm water
- A soft cloth or paper towel
- White vinegar or isopropyl alcohol for deep cleaning
- A clean, ventilated spot to air-dry
Step 1: Rinse Your Facial Cleansing Brush After Every Use
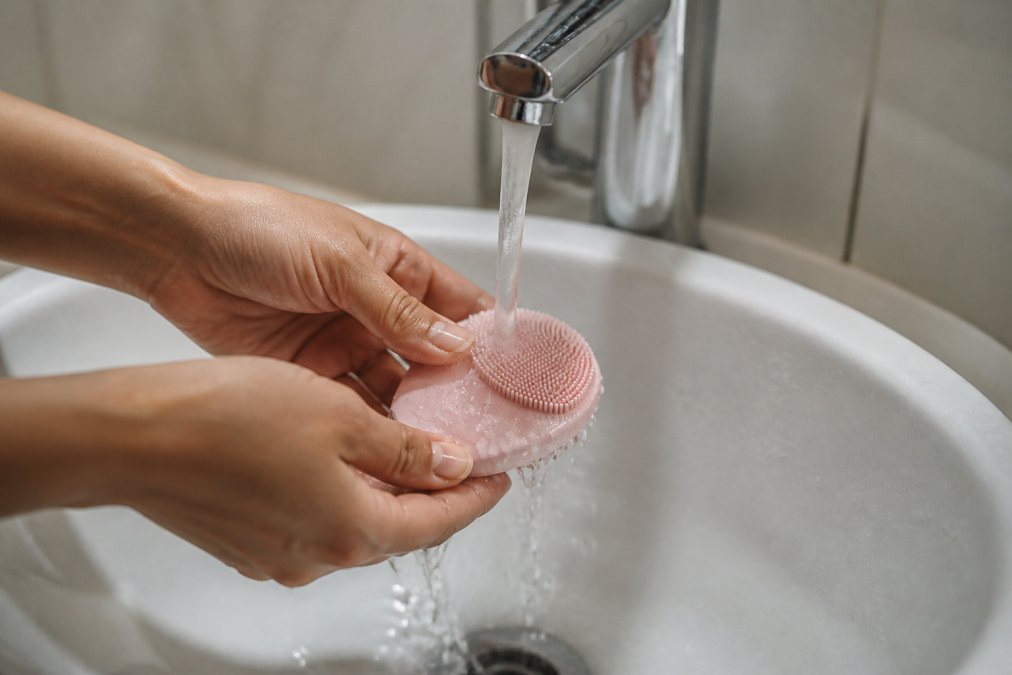
Rinsing takes about 15 seconds and prevents most bacteria buildup before it starts. Hold the brush head under warm water and let the stream run through the bristles or silicone nubs until no residue remains.
Step 2: Deep Clean With the Best Soap for Cleaning Facial Brushes
The best soap for cleaning facial brushes is a mild, fragrance-free cleanser, not antibacterial hand soap. Harsh detergents strip the bristle coating and leave residue that can irritate skin.
Once a week, follow this routine:
- Wet the brush head with warm water.
- Add a small drop of gentle cleanser.
- Swirl the bristles against your palm for 30 seconds.
- Rinse until the water runs clear.
- Shake off excess water and air-dry.
Step 3: How to Disinfect a Silicone Face Scrubber Safely
Material compatibility at a glance:
- Medical-grade silicone (non-porous): Tolerates diluted white vinegar soaks, 70% isopropyl alcohol wipes, and brief contact with benzalkonium chloride disinfectants. Avoid oil-based cleaners and anything containing petroleum distillates, which can leave a film and cause silicone to swell over repeated exposure.
- Nylon or synthetic bristles (porous): Handle alcohol wipes well but degrade with repeated vinegar soaks. The acetic acid gradually roughens the filament surface, creating microscopic pits where residue and microbes collect. Limit vinegar soaks to once a month.
- Natural bristles (boar, goat hair): The most fragile. Skip vinegar entirely, it strips the natural oils that keep filaments supple and causes splitting. Use a quick 70% isopropyl alcohol wipe and air-dry immediately.
- Silicone with embedded antimicrobial silver or zinc: Still clean it. Antimicrobial additives slow bacterial growth but do not remove residue, dead skin, or product buildup, and their effectiveness fades with age.
Vinegar soak method (silicone and, sparingly, nylon):
- Mix one part white vinegar with two parts warm water in a bowl.
- Submerge only the brush head, never the handle or battery compartment.
- Soak for 5 minutes (10 minutes maximum for visible buildup).
- Rinse thoroughly under warm running water until no vinegar scent remains.
- Pat dry with a clean, lint-free cloth.
Isopropyl alcohol method (all materials, best for weekly touch-ups):
- Use 70% isopropyl alcohol, not 91% or 99%. The 70% concentration contains enough water to penetrate microbial cell walls before evaporating; higher concentrations evaporate too fast to disinfect effectively.
- Saturate a cotton pad and wipe the brush head surface and between bristle rows. Do not soak.
- Let it air-dry for 60 seconds. Alcohol leaves no residue.
What to never use:
- Bleach: Cracks silicone over time and leaves caustic residue that can irritate skin even after rinsing.
- Hydrogen peroxide: Generally safe on silicone but can discolor nylon bristles and degrade bristle glue.
- Antibacterial hand soap: Contains triclosan or benzalkonium chloride at concentrations meant for skin, not devices; leaves a residue film that traps debris.
- Dishwasher or microwave "sanitizing": Heat warps silicone and melts bristle adhesive. No facial brush head is dishwasher-safe.
If you are unsure what your brush head is made of, check the manufacturer's product page or the underside of the head itself, most silicone devices are labeled, and replacement-head packaging usually lists the filament type.
Step 4: Dry and Store Your Brush to Prevent Bacteria Buildup
The drying protocol:
- Shake off excess water with a firm downward flick over the sink, three or four shakes removes most standing water.
- Blot the bristles gently against a clean towel. Do not rub; friction bends filaments and pushes moisture deeper into the base.
- Stand the brush upright in an open holder so gravity pulls water away from the bristle base and handle seam.
- Leave it in a ventilated spot with moving air. A bathroom counter near an open window or a bedroom dresser works better than a closed medicine cabinet.
- Allow a full 6 to 8 hours to dry completely before the next use. If you cleanse twice a day, this is why owning two brush heads, or rotating between them, matters.
Storage rules:
- Stand the brush upright so air reaches the bristles from all sides.
- Store it in a ventilated spot, not a sealed travel case or a zippered bag.
- Keep it at least 6 feet from the toilet to limit airborne bacteria from flushing.
- Never lay a wet brush flat on the counter, the bristle base stays wet and the surface contact traps moisture.
- Do not store it in the shower. Constant humidity prevents full drying between uses.
Troubleshooting mold and mildew (the problem most guides ignore):
- Isolate it. Stop using the brush on your face immediately. Do not try to "clean through" the problem while continuing to use it.
- Inspect the base. Look at the seam where bristles meet the head and where the head meets the handle. If mold has reached the internal seam or the motor housing, the head is not salvageable, replace it.
- If growth is surface-only on silicone: Soak the head in the vinegar solution (1 part white vinegar to 2 parts warm water) for 10 minutes. Scrub gently with a soft-bristle toothbrush, rinse thoroughly, and air-dry completely in direct airflow.
- If growth is on nylon bristles: Vinegar soaks can worsen the problem by roughening filaments. Instead, wipe thoroughly with 70% isopropyl alcohol, then discard the head if any discoloration remains after drying. Bristle brushes with visible mold are almost never fully recoverable.
- After treatment, monitor for 48 hours. If the smell or spots return, replace the head. Recurring mildew means the growth has colonized the internal structure.
Prevention beats treatment:
- Never store a damp brush in a closed container, even overnight.
- Rotate between two heads if you cleanse morning and night.
- Replace heads on schedule, a head past its replacement window dries more slowly because worn filaments hold more water.
- Skip fabric-lined travel pouches for daily storage; they trap humidity. Use them only for transport, and unpack the brush immediately on arrival.
If you spot dark spots or a musty smell and the head is more than two months old, replacement is almost always the better call than treatment.
How Often to Clean a Facial Brush (and When to Replace the Head)
How often to clean facial brush devices depends on the step. Rinse daily, deep clean weekly, and disinfect monthly.
| Task | Frequency | Time Needed |
|---|---|---|
| Rinse after use | Every use | 15 seconds |
| Deep clean with soap | Weekly | 1 minute |
| Disinfect with vinegar or alcohol | Monthly | 5-10 minutes |
| Replace brush head | Every 3 months | 2 minutes |
Signs Your Facial Brush Needs Replacing
Signs your facial brush needs replacing show up before the head looks worn out. Watch for these:
- Bristles that feel stiff, bent, or scratchy
- Discolored or dark patches that won't rinse clean
- A lingering smell even after disinfecting
- Visible cracks in the silicone
- Skin irritation after use
Common Mistakes to Avoid When Cleaning Your Brush
The biggest mistake is skipping the daily rinse and relying on a weekly deep clean. Residue left on bristles hardens and feeds microbial growth between washes.
Other mistakes to avoid:
- Soaking the whole device instead of just the head
- Using hot water, which warps silicone and loosens bristle glue
- Storing a damp brush in a closed bag or drawer
- Sharing your brush with anyone else
- Using bleach or abrasive cleaners on any part
Frequently Asked Questions
How do I sanitize my facial cleansing brush without damaging it?
For silicone brushes, wipe the surface with isopropyl alcohol or a diluted white vinegar solution and rinse well. For bristle brushes, soak the head in warm water with mild soap for a few minutes, then rinse and air-dry completely. Never submerge the motorized handle in water, and avoid harsh cleaners that can break down silicone or loosen bristle glue over time.
How often should I replace my facial cleansing brush head?
Replace bristle brush heads every three months with regular use. Replace them sooner if bristles look frayed, flattened, or discolored, or if you notice a lingering odor after cleaning. Silicone brushes last longer but should be inspected monthly for cracks or sticky residue where bacteria can hide. A worn head won't exfoliate evenly and can irritate your skin.
Can I use alcohol to disinfect my silicone face brush?
Yes. Isopropyl alcohol works well on silicone because the material is non-porous and won't absorb it. Wipe the silicone surface with a cotton pad dampened with alcohol, then rinse thoroughly with warm water before your next use. Don't soak the entire device, and keep alcohol away from the charging port or battery compartment. For daily upkeep, mild soap and warm water are enough.
What happens if I skip cleaning my facial brush regularly?
Skipping regular cleaning lets dead skin cells, makeup residue, and oil collect in the bristles or silicone ridges. That buildup becomes a breeding ground for bacteria, which can transfer back to your face and cause breakouts, irritation, or clogged pores. Rinsing after every use takes seconds, and a deeper clean once a week keeps your brush hygienic and your skin clearer.
Cleaning a facial cleansing brush properly comes down to consistency, not effort. A daily rinse, a weekly wash, and a monthly disinfect keep your tool working and your skin clear. If your brush head is past its prime, or you want to upgrade to a silicone device that's easier to maintain, Hutch's Beauty Boutique has the tools and refills to keep your routine running. Search our catalog to find your next cleansing brush and everything that goes with it.


