Table of Contents
- What You'll Need Before You Start
- Step-by-Step: How to Use Your LED Mask for Best Results
- LED Light Therapy Mask Frequency: How Often Is Too Often?
- Best Skincare Products to Use With LED Mask
- LED Mask Safety Precautions You Should Never Skip
- Common Mistakes That Kill Your Results
- Frequently Asked Questions
Last Updated: September 21, 2026
What You'll Need Before You Start
Getting great results from an LED mask starts before you even turn it on. The most common mistake is treating it like a quick add-on to your routine. It works best when you build a simple, repeatable session around it.
Here's what you'll need on hand:
- A clean, fully charged LED mask
- A gentle cleanser
- Protective goggles (usually included with the mask)
- A light, hydrating serum
- A timer or the mask's built-in session limit
- A phone note or calendar to log sessions
Consistency is what drives results, not intensity.
Step-by-Step: How to Use Your LED Mask for Best Results
Using an LED mask correctly comes down to three things: clean skin, a snug fit, and a steady schedule. Get those right and you're ahead of most people who own one.
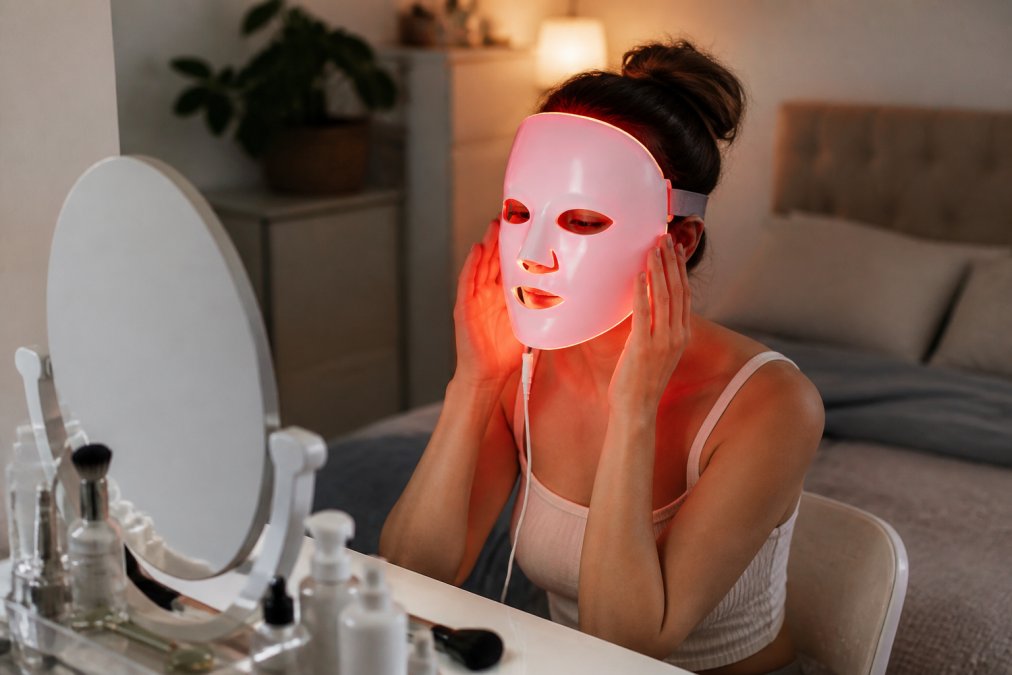
Step 1: Prep Your Skin
Start with clean, dry skin. Wash with a gentle cleanser, then pat dry. Skip heavy creams right before your session.
Why does this matter? Light has to reach the skin to do anything. A thick layer of product blocks it. A common mistake is applying a rich night cream first, then masking. The light never gets through.
Step 2: Position the Mask for Full Coverage
Place the mask so it sits flat against your face. A gap between the mask and your skin means less light absorption in that spot.
- Adjust the strap so it feels snug, not tight
- Line the eye openings up with your eyes
- Tuck hair away from your forehead
- Check that the nose cutout sits comfortably
A flexible silicone mask usually fits better than a hard shell. If you have a hard-shell model, spend an extra second getting the fit right.
Step 3: Run the Treatment and Track Your Sessions
Turn the mask on and let it run for the full session. Most devices run 3 to 20 minutes, depending on the model.
Then log it. Note the date, the session length, and any changes in your skin. This habit is what separates people who see results from people who give up.
LED Light Therapy Mask Frequency: How Often Is Too Often?
Most people get the best results using an LED light therapy mask three to five times per week. More is not better. Your skin needs time between sessions for cellular repair.
Here's a simple starting schedule:
| Week | Sessions Per Week | Session Length |
|---|---|---|
| Week 1-2 | 3 | 10 minutes |
| Week 3-4 | 4 | 10-15 minutes |
| Week 5+ | 4-5 | Per device guide |
Start slow if your skin is sensitive.
Calibration and Fit: The Step Most People Skip
Frequency only works if the light actually reaches your skin. Two factors control that: strap tension and mask-to-skin contact.
- Strap tension: The mask should feel snug but not tight. If the strap leaves deep marks after a session, it's too tight and may be pressing the LEDs too close in some areas while lifting them away in others. If you can slide a finger under the strap easily, it's too loose.
- Facial anatomy: LED masks are built for an average face. If you have a prominent brow bone, a narrow jaw, or a wider forehead, some panels may sit farther from your skin than others. A flexible silicone mask usually conforms better than a hard-shell model.
- The mirror check: Before you start the timer, look in a mirror and check for gaps along the cheeks, chin, and forehead. Press the mask gently into place where you see light leaking out.
- Nose cutout: If the nose cutout is too large for your face, light can escape around the sides. Some masks include foam inserts or adjustable nose bridges, use them.
Tracking Progress So You Know It's Working
"Best results" is a claim you can only validate if you measure something. Most people rely on memory, which is unreliable over weeks and months. A simple tracking system fixes that.
- Standardized photos: Take a photo every Sunday in the same spot, same lighting, same distance, no makeup. Use your phone's front camera at eye level. Save them in a dedicated album.
- Skin health notes: Once a week, jot down three things, texture, tone, and any irritation. Keep it to one line each.
- Session log: Note the date, session length, and which products you layered. This is how you spot patterns, like whether a specific serum correlates with better or worse outcomes.
- Monthly review: At the end of each month, compare your photos side by side. Changes in LED therapy are gradual, and side-by-side comparison is the only way to see them clearly.
Best Skincare Products to Use With LED Mask
Most guides stop at "clean and dry." That advice is correct but incomplete. The real edge is knowing which ingredients are safe to layer before and after a session, and which ones should be moved to off days. Light therapy doesn't just sit on top of your skin, it interacts with what's already there.
The Safe Layering List
These ingredients are generally considered compatible with LED sessions because they hydrate, soothe, or support the skin barrier without increasing light sensitivity:
- Hyaluronic acid, draws water into the skin and creates a clean, light base that doesn't block light penetration
- Glycerin, a humectant that keeps skin hydrated without a heavy film
- Niacinamide, supports the barrier and can help calm redness after a session
- Panthenol (vitamin B5), soothing and well-tolerated for most skin types
- Ceramides, reinforce the barrier, especially useful after a session when skin may be slightly warm
- Centella asiatica (cica), a common post-treatment soother in Korean and clinical skincare
- Squalane, a lightweight emollient that won't occlude light the way heavy creams can
What to Move to Off Days
These ingredients don't have to be cut out of your routine, they just shouldn't be layered immediately before or after an LED session:
- Retinol and retinoids, increase cell turnover and can make skin more reactive to light and heat
- AHA/BHA exfoliants, strip the outer layer and can amplify sensitivity
- Vitamin C in high concentrations, can be irritating on compromised skin, though a low-percentage formula is usually fine in the morning
- Benzoyl peroxide, drying and potentially photosensitizing for some users
- Essential oils and fragranced serums, a common trigger for post-session irritation
A Sample Mask-Night Routine
- Cleanse with a gentle, non-stripping cleanser. Pat dry.
- Apply a light hydrating serum, hyaluronic acid or a niacinamide blend works well.
- Run your LED session per your device guide.
- Follow with a ceramide or squalane moisturizer to seal in hydration.
- In the morning, apply broad-spectrum SPF 30 or higher.
This is where most guides stop at "clean and dry." The real edge is timing your actives around your sessions, not cutting them out. Layering the right hydrators before and after can make the difference between a session that feels like nothing and one that visibly supports your skin over time.
LED Mask Safety Precautions You Should Never Skip
Eye protection is the one rule you never bend. Always wear the goggles that came with your mask. Never look directly into the lights.
Other safety basics:
- Follow the device's session limit exactly
- Stop if you feel heat or stinging
- Don't use a mask on broken or sunburned skin
- Check with a doctor first if you're pregnant or on light-sensitizing meds
- Clean the mask surface after each use
Common Mistakes That Kill Your Results
The biggest results-killer is quitting too soon. Light therapy works slowly. Most people need several weeks of steady use before they notice changes in skin texture or fine lines.
Other mistakes that waste your effort:
- Using it on dirty skin. Product and oil block light absorption.
- Skipping days. An irregular schedule stalls progress.
- Going too long. More time per session doesn't mean faster results.
- Ignoring the fit. Gaps mean uneven treatment.
- Never cleaning the mask. Buildup affects light output over time.
Frequently Asked Questions
How often should you use an LED light therapy mask?
Most LED masks are designed for daily use, but 3 to 5 times per week is enough for visible results. Start with 10-minute sessions and follow your device's instructions. Consistency matters more than frequency; skipping days slows collagen production and cellular repair. If your skin feels sensitive, reduce to every other day. Always check the manufacturer's recommended treatment time.
Do you use an LED mask on clean or dirty skin?
Always start with clean, dry skin. Remove makeup, sunscreen, and excess oil before your session. A clean surface allows light absorption to reach the dermis without interference. Wash with a gentle cleanser, pat dry, and wait a minute before putting on the mask. If you apply serums first, choose water-based formulas without retinol or exfoliants, as those can increase skin sensitivity during light therapy.
Can you use serums under an LED light therapy mask?
Yes, but only certain types. Hyaluronic acid, niacinamide, and vitamin C serums are safe and can enhance results. Avoid retinol, AHAs, BHAs, and other exfoliants before treatment because they thin the skin barrier and raise the risk of irritation. Apply a thin layer of your chosen serum, let it absorb for 2-3 minutes, then wear the mask. After treatment, follow with a moisturizer and SPF if you're heading outside.
How long does it take to see results from an LED mask?
Most users notice improved skin texture and a subtle glow within 4 to 6 weeks of consistent use. Fine lines and acne management may take 8 to 12 weeks. Results depend on wavelength, treatment time, and how regularly you use the device. Red light and near-infrared stimulate collagen production and cellular repair over time.


