Table of Contents
- How Microneedling Works for Acne Scars
- Choosing the Best Needle Length for Acne Scars
- How to Sanitize Your Derma Roller Properly
- Serums to Use With Your Derma Roller
- Risks of At-Home Microneedling and Safety Precautions
- Your Step-by-Step Derma Rolling Protocol
- Recovery Time and What to Expect
- Frequently Asked Questions
Last Updated: October 3, 2026
How Microneedling Works for Acne Scars
Derma rolling for acne scars works through a process called collagen induction therapy. When you roll the derma roller across your skin, the tiny needles create controlled micro-channels in the epidermis and dermis layers. Your body responds to this subsurface trauma by triggering its natural healing cascade, which jumpstarts collagen synthesis and elastin production.
Atrophic scars (the depressed, pitted scars left by severe acne) respond particularly well to derma rolling because they lack collagen. The micro-channels signal your skin to rebuild what was lost. Over multiple sessions, this collagen remodeling gradually fills in scar depth and improves skin texture.
The Collagen Induction Process
Your skin doesn't repair itself all at once. The healing happens in stages. First, inflammation signals your body that repair is needed. Then fibroblasts activate and begin producing new collagen. This process takes weeks, which is why consistency matters more than a single aggressive session.
The micro-channels also improve serum absorption. Serums and topical treatments penetrate deeper when applied right after derma rolling, making them far more effective than applying them to undamaged skin.
Why Atrophic Scars Respond to Derma Rolling
Atrophic scars sit below the skin's surface because collagen was destroyed during the inflammatory phase of acne. Derma rolling restarts collagen production in those exact areas. The needle depth determines how deep the treatment reaches, which is why choosing the right needle length matters.
Not all scars respond equally. Rolling works best on shallow to moderate scars. Deep, severe scars may need professional laser treatments or other clinical approaches. But for most people dealing with acne scarring, derma rolling offers real improvement over time.
Choosing the Best Needle Length for Acne Scars
Needle length determines treatment depth. For acne scars at home, most people use needles between 0.5mm and 1.5mm. Shorter needles (0.5-0.75mm) improve skin texture and boost serum absorption but don't reach deep enough for significant scar improvement.
Start with 0.75mm if you're new to derma rolling. This length works for most acne scars without requiring extensive recovery time. If your scars are deeper or you've used a derma roller before, 1.0-1.5mm needles deliver better results, though they require more careful technique and post-procedure care.
Never exceed 1.5mm at home. Professional microneedling treatments use longer needles under clinical supervision. At-home use beyond 1.5mm increases infection risk and can damage healthy skin.
How to Sanitize Your Derma Roller Properly
Sanitization is non-negotiable. A contaminated derma roller introduces bacteria directly into open micro-channels, risking infection, scarring, and systemic complications. Most at-home users confuse cleaning with sterilization, they are not the same thing. Cleaning removes visible debris; sterilization kills pathogens that cleaning alone cannot eliminate.
The Difference Between Cleaning and Sterilization
Cleaning reduces the microbial load on your derma roller. Sterilization eliminates it entirely. For at-home derma rolling, true sterilization is difficult to achieve without autoclave equipment (which costs $300-$1,000+). However, high-level disinfection, a middle ground between cleaning and sterilization, is achievable and strongly recommended.
Bacteria, viruses, and fungi can survive standard soap-and-water cleaning. If your derma roller touches your face after inadequate disinfection, you're introducing pathogens directly into micro-channels that bypass your skin's natural barrier. This is why professional clinics use autoclaves or single-use needles; they cannot risk infection liability.
Chemical Disinfection Protocol for At-Home Use
For at-home derma rollers, 70% isopropyl alcohol (IPA) is the gold standard for high-level disinfection. It kills most bacteria, viruses, and fungi within 10-15 minutes of contact. However, the concentration and contact time matter critically.
Proper chemical disinfection steps:
-
Pre-rinse under running water, Remove any blood, serum, or skin cells. Use lukewarm water and gentle pressure; do not scrub the needles (this can dull them and cause bristle breakage).
-
Soak in 70% isopropyl alcohol for 10-15 minutes, This is the minimum contact time for effective disinfection. Do not skip this step or reduce the time. Submerge the entire roller head; alcohol must contact all needle surfaces. If you use lower-concentration alcohol (like 50%), increase contact time to 20 minutes. Do not use 90%+ alcohol; it evaporates too quickly to be effective.
-
Rinse thoroughly with distilled water, Tap water contains minerals and trace bacteria that can recontaminate your roller. Distilled water removes all alcohol residue without introducing new pathogens. Rinse for at least 30 seconds under running distilled water.
-
Air dry completely on a clean surface, Place the roller needle-side up on a clean paper towel or lint-free cloth. Moisture left on the roller can harbor bacteria. Allow at least 10-15 minutes of air-drying before storage. Do not use a regular towel; lint can stick to needles.
-
Store in a sealed, clean container, Once dry, place your roller in a clean, dry container with a lid. Dust and airborne bacteria can contaminate a dry roller if left exposed. A small plastic case or sealed jar works well.
When Standard Disinfection Is Not Enough
If you have any of the following conditions, standard chemical disinfection may not be sufficient. Consider consulting a dermatologist or using a professional service instead:
- Active skin infections (bacterial, fungal, or viral)
- Immunosuppression or HIV/AIDS
- Recent antibiotic use for skin infections
- Severe eczema or open wounds on your face
- Diabetes with poor wound healing
In these cases, the infection risk outweighs the benefit of at-home rolling.
Replacement Schedule and Needle Degradation
Replace your derma roller every 3-6 months, depending on use frequency. Over time, needles become dull, bent, or corroded, even with proper storage. Dull needles require more pressure to penetrate, increasing the risk of skin tearing and infection. Corroded needles (visible as discoloration or pitting) can harbor bacteria in microscopic crevices that disinfection cannot reach.
If you roll twice weekly, replace every 3 months. If you roll once every 2-3 weeks, every 6 months is acceptable. Mark your purchase date on the container so you don't lose track.
Signs Your Roller Needs Immediate Replacement
- Visible rust, discoloration, or corrosion on the needle head
- Bent or broken needles
- Needles that feel dull when lightly dragged across your fingernail (a sharp needle will catch slightly)
- Any odor or visible contamination that doesn't rinse away
Using a compromised roller defeats the purpose of sanitization and increases infection and scarring risk significantly.
Serums to Use With Your Derma Roller
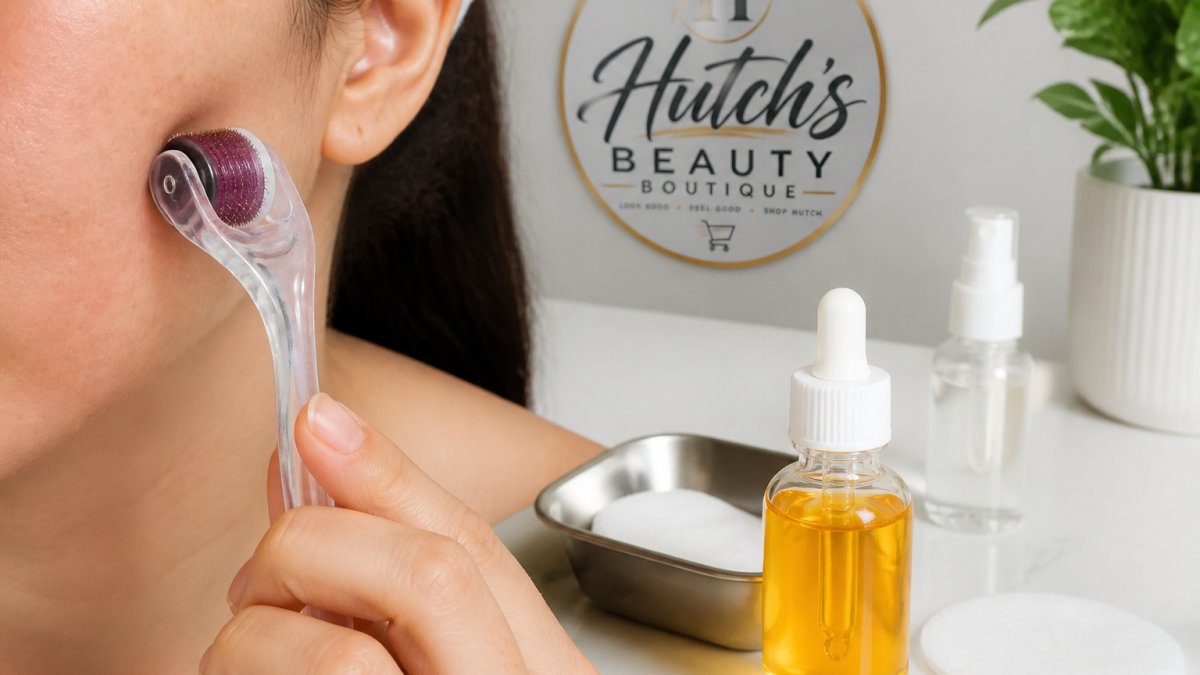
The window right after derma rolling is when your skin absorbs topical treatments most effectively. Serums penetrate through the micro-channels you've just created, reaching deeper layers where they can work on scar tissue and collagen production.
Best serums for acne scars:
- Vitamin C serums boost collagen synthesis and fade post-inflammatory erythema (the red marks left after acne heals)
- Hyaluronic acid hydrates and plumps skin, making shallow scars less noticeable
- Niacinamide reduces inflammation and strengthens your skin barrier
- Growth factor serums signal fibroblasts to produce more collagen
Apply serum immediately after rolling, while your skin is still slightly damp. Let it absorb for 10-15 minutes before applying moisturizer. Avoid actives like retinol or acids on rolling days, your skin needs to focus on healing, not processing chemical exfoliants.
Risks of At-Home Microneedling and Safety Precautions
At-home derma rolling carries real risks if done incorrectly. The biggest dangers are infection, excessive inflammation, and permanent skin damage. Understanding these risks and how to avoid them makes the difference between safe improvement and lasting harm.
Why You Must Avoid Active Breakouts
Never roll over active acne. Open pimples, pustules, or inflamed breakouts are entry points for bacteria. Rolling over active breakouts spreads bacteria deeper into the skin and can turn a small pimple into a severe infection. Wait until breakouts fully heal and the skin has returned to normal.
If you have cystic acne or frequent breakouts, derma rolling isn't the right timing for you right now. Treat the acne first, let your skin fully clear, then start your rolling protocol.
Contraindications for Specific Skin Types
Some skin conditions make at-home derma rolling unsafe. If you have any of these, consult a dermatologist before rolling:
- Active rosacea or severe sensitivity
- Eczema or psoriasis (rolling can trigger flare-ups)
- Keloid-prone skin (your body overproduces collagen, and rolling can worsen this)
- Recent chemical peels or laser treatments (your skin barrier is already compromised)
- Immunosuppression or conditions affecting wound healing
- Skin infections like ringworm or impetigo
Hyperpigmentation risk is higher for darker skin tones (pubmed.ncbi.nlm.nih.gov). Rolling can trigger post-inflammatory hyperpigmentation if not done carefully. If you have darker skin, use shorter needles (0.5-0.75mm), roll less frequently (once every 2-3 weeks instead of weekly), and apply strict sun protection afterward.
Your Step-by-Step Derma Rolling Protocol
What You'll Need Before Starting
Gather everything before you begin. You'll need:
- A clean, sterile derma roller (0.75-1.5mm for acne scars)
- 70% isopropyl alcohol
- Distilled water
- Gentle cleanser
- Hydrating serum (vitamin C or hyaluronic acid)
- Broad-spectrum SPF 30+ sunscreen
- Clean towels or paper towels
- Optional: numbing cream (reduces discomfort on longer needles)
Have these ready so you're not searching mid-procedure. Preparation keeps the process efficient and your skin protected.
The Rolling Technique
Start with clean, dry skin. Wash your face with a gentle cleanser and pat dry completely. Wet skin makes rolling uncomfortable and reduces needle contact.
Apply numbing cream if using needles longer than 1.0mm. Wait 15-20 minutes for it to take effect. This step is optional but makes longer needle sessions much more tolerable.
Roll in four directions across each area: vertical, horizontal, and both diagonals. Use light to medium pressure, never press hard. You should feel mild sensation, not pain.
Roll each area 8-10 times per direction. Don't over-roll the same spot. The goal is consistent coverage, not aggressive trauma.
Apply serum immediately after rolling. Your skin is primed to absorb it. Let it sit for 10-15 minutes, then apply moisturizer.
Post-Procedure Skincare Routine
The 24-48 hours after rolling is critical for healing. Your skin needs protection and support during this window.
First 24 hours:
- Skip all actives (retinol, acids, vitamin A)
- Use only gentle, hydrating products
- Apply SPF 30+ if you go outside
- Avoid hot showers or saunas (heat increases inflammation)
- Don't touch your face unnecessarily
Days 2-7:
- Continue gentle skincare only
- Reapply sunscreen throughout the day
- Stay hydrated (drink plenty of water)
- Avoid strenuous exercise or sweating for 48 hours
- Sleep on a clean pillowcase
Consistency beats intensity. Rolling once every 2-3 weeks for 8-12 weeks shows real improvement. Rolling too frequently damages your skin barrier and increases infection risk.
Recovery Time and What to Expect
Expect mild redness and sensitivity for 24-48 hours after rolling. This is normal inflammation, your skin is healing. The redness fades as inflammation subsides.
Mild flaking or dryness may appear 3-5 days after rolling. This is dead skin shedding as new collagen forms. Don't pick at it. Use hydrating products and let it shed naturally.
Real scar improvement takes time. Most people see noticeable changes after 6-8 sessions spaced 2-3 weeks apart. Deeper scars may need 10-12 sessions. Patience matters. Collagen remodeling happens gradually, and pushing too hard backfires.
Photos show improvement your eyes might miss day-to-day.
Derma rolling for acne scars works, but only when done correctly and consistently. The biggest mistake people make is expecting overnight results or using improper technique that damages skin instead of healing it.
Frequently Asked Questions
Do derma rollers actually work for acne scars?
Yes, derma rolling stimulates collagen induction therapy through micro-channels in the skin. This process triggers the healing cascade and increases collagen synthesis, which helps fill atrophic scars and improve skin texture over time. Results typically appear after 4-6 weeks of consistent use, though deeper scars may require professional treatments for optimal results.
What is the best needle length for acne scars?
For at-home derma rolling, use 0.5mm to 1.0mm needle length. The 0.75mm gauge is ideal for most acne scar depths, providing enough subsurface trauma to trigger collagen production without excessive downtime. Deeper atrophic scars may benefit from professional treatments using longer needles (1.5mm or more), which require dermatologist supervision.
Is it safe to use a derma roller on active acne?
No. Never use a derma roller on active breakouts. Rolling over inflamed skin spreads bacteria, increases inflammation, and can worsen acne. Wait until breakouts have fully healed and skin is clear before starting your derma rolling routine. This is the most critical safety precaution for at-home microneedling.
How often should you use a derma roller for acne scars?
This frequency allows adequate time for the skin barrier to repair and collagen synthesis to progress without causing excessive inflammation or irritation. You can assess results and adjust frequency based on your skin's response.


